WALLS
Team: Andrew Kovacs, Sam Yehros, 2016
20 STEPS FOR CREATING BEAUTIFUL FLOOR PLANS MADE OF WALLS:
1. Open a floor plan in Photoshop.
a. For ease of selection, the floor plan should have mostly straight walls.
2. Select the ‘Rectangular Marquee Tool’ (M).
3. Drag your mouse over the selection of the wall you would like to cut out.
a. Be sure to choose architecturally attractive walls.
4. Select the ‘Move Tool’ (V).
5. Right click and remove the wall from the overall floor plan.
6. Drag the wall section into a separate Photoshop file. This will become your stock file of new walls made from old walls.
7. Using the ‘Rectangular Marquee Tool’ (M), clean up the old wall. Edges must be straight.
a. Delete all white space from the old wall.
b. Walls should be open and not fully enclosing space.
1. No closed off squares, circles, triangles, etc.
8. Contemplate all the new walls that have been made from old walls and gathered in the separate Photoshop file, the stock file of new walls.
a. Be sure that new walls do not overlap.
b. New walls should be organized be size and line weight.
9. Create a new file in Photoshop, this will be your shape file.
a. The dimensions of the shape file are arbitrary, and can be adjusted for any particular use.
b. The followers of these steps may choose a size for their document.
10. Select the ‘Shape Tool’ (U).
11. Choose a shape.
a. Users may select any of the shapes offered by Photoshop, sample shapes from elsewhere, or create their own shape.
b. Shapes may be layered, stacked, or overlapped.
12. Drag shape to desired size and position in document.
a. A small margin of white space should be left on all sides of the shape.
13. Fill the shape with color #ff0000.
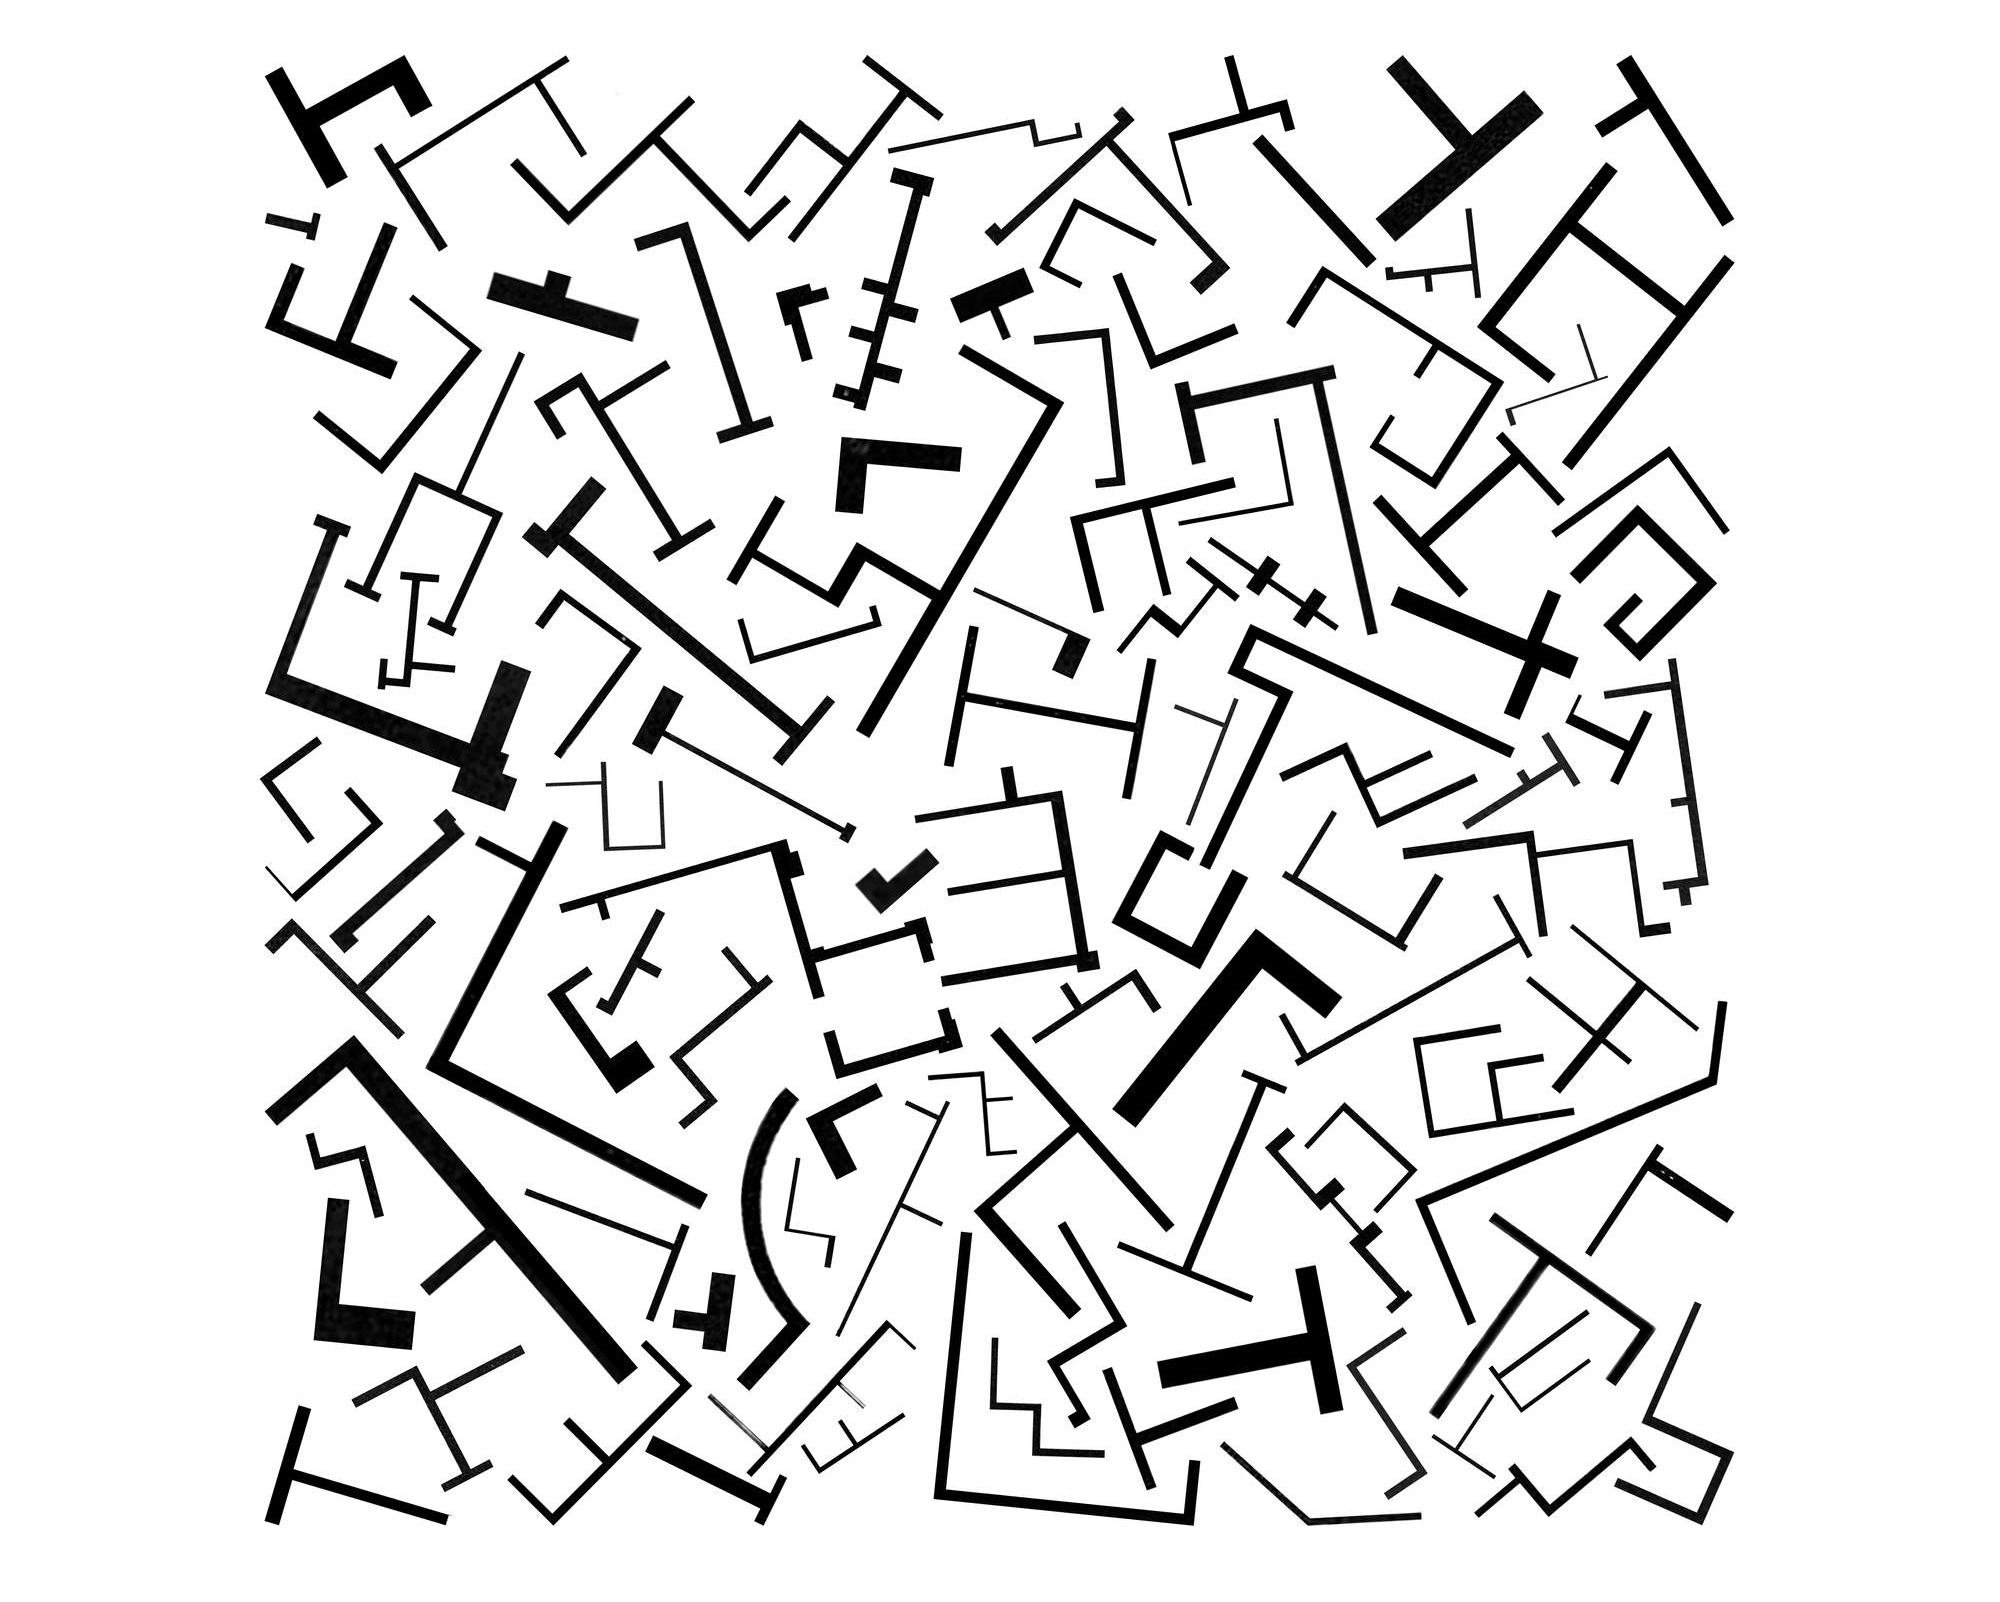
14. Using the shape as a guide, begin to drag walls, using the ‘Move Tool’ (V) from the stock file that contains new walls made from old walls into the shape file.
a. All walls should be different.
b. All walls should be closely related to other walls in their thickness.
c. All walls should be rotated on a unique axis and not parallel with one another.
d. All walls should have distance between them and not touch.
e. Some walls should spatially interlock with the walls adjacent to them.
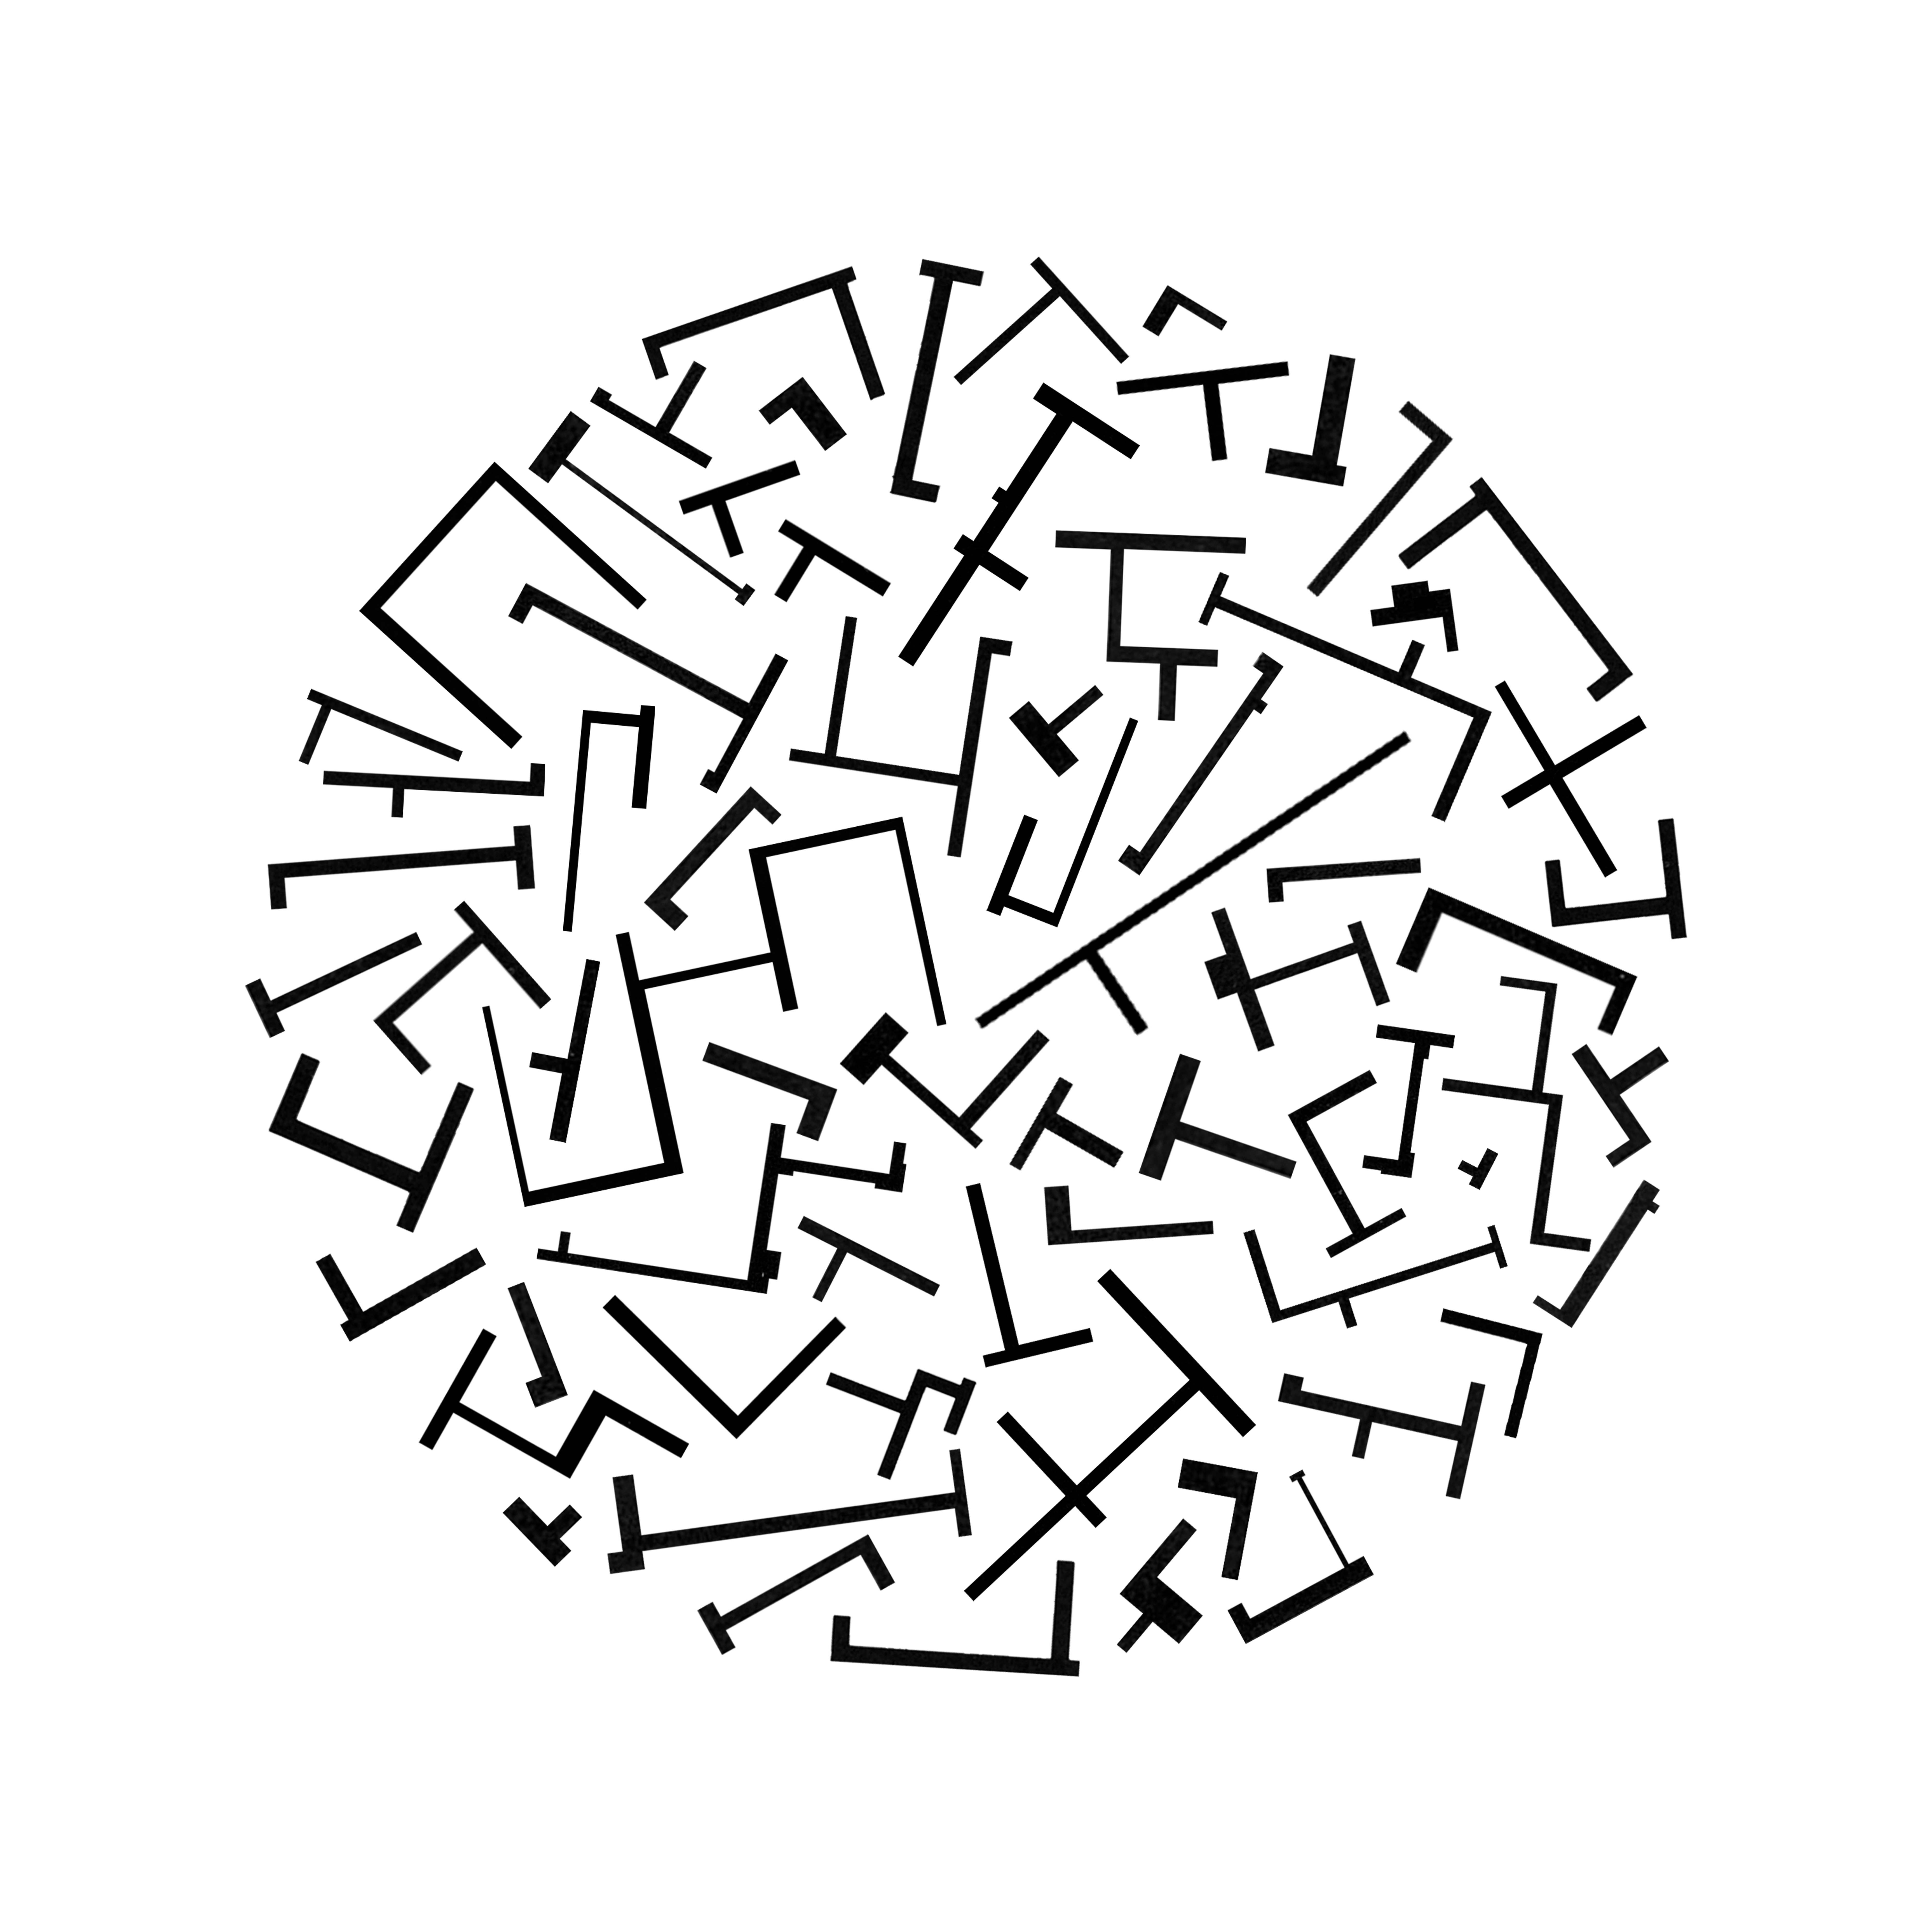
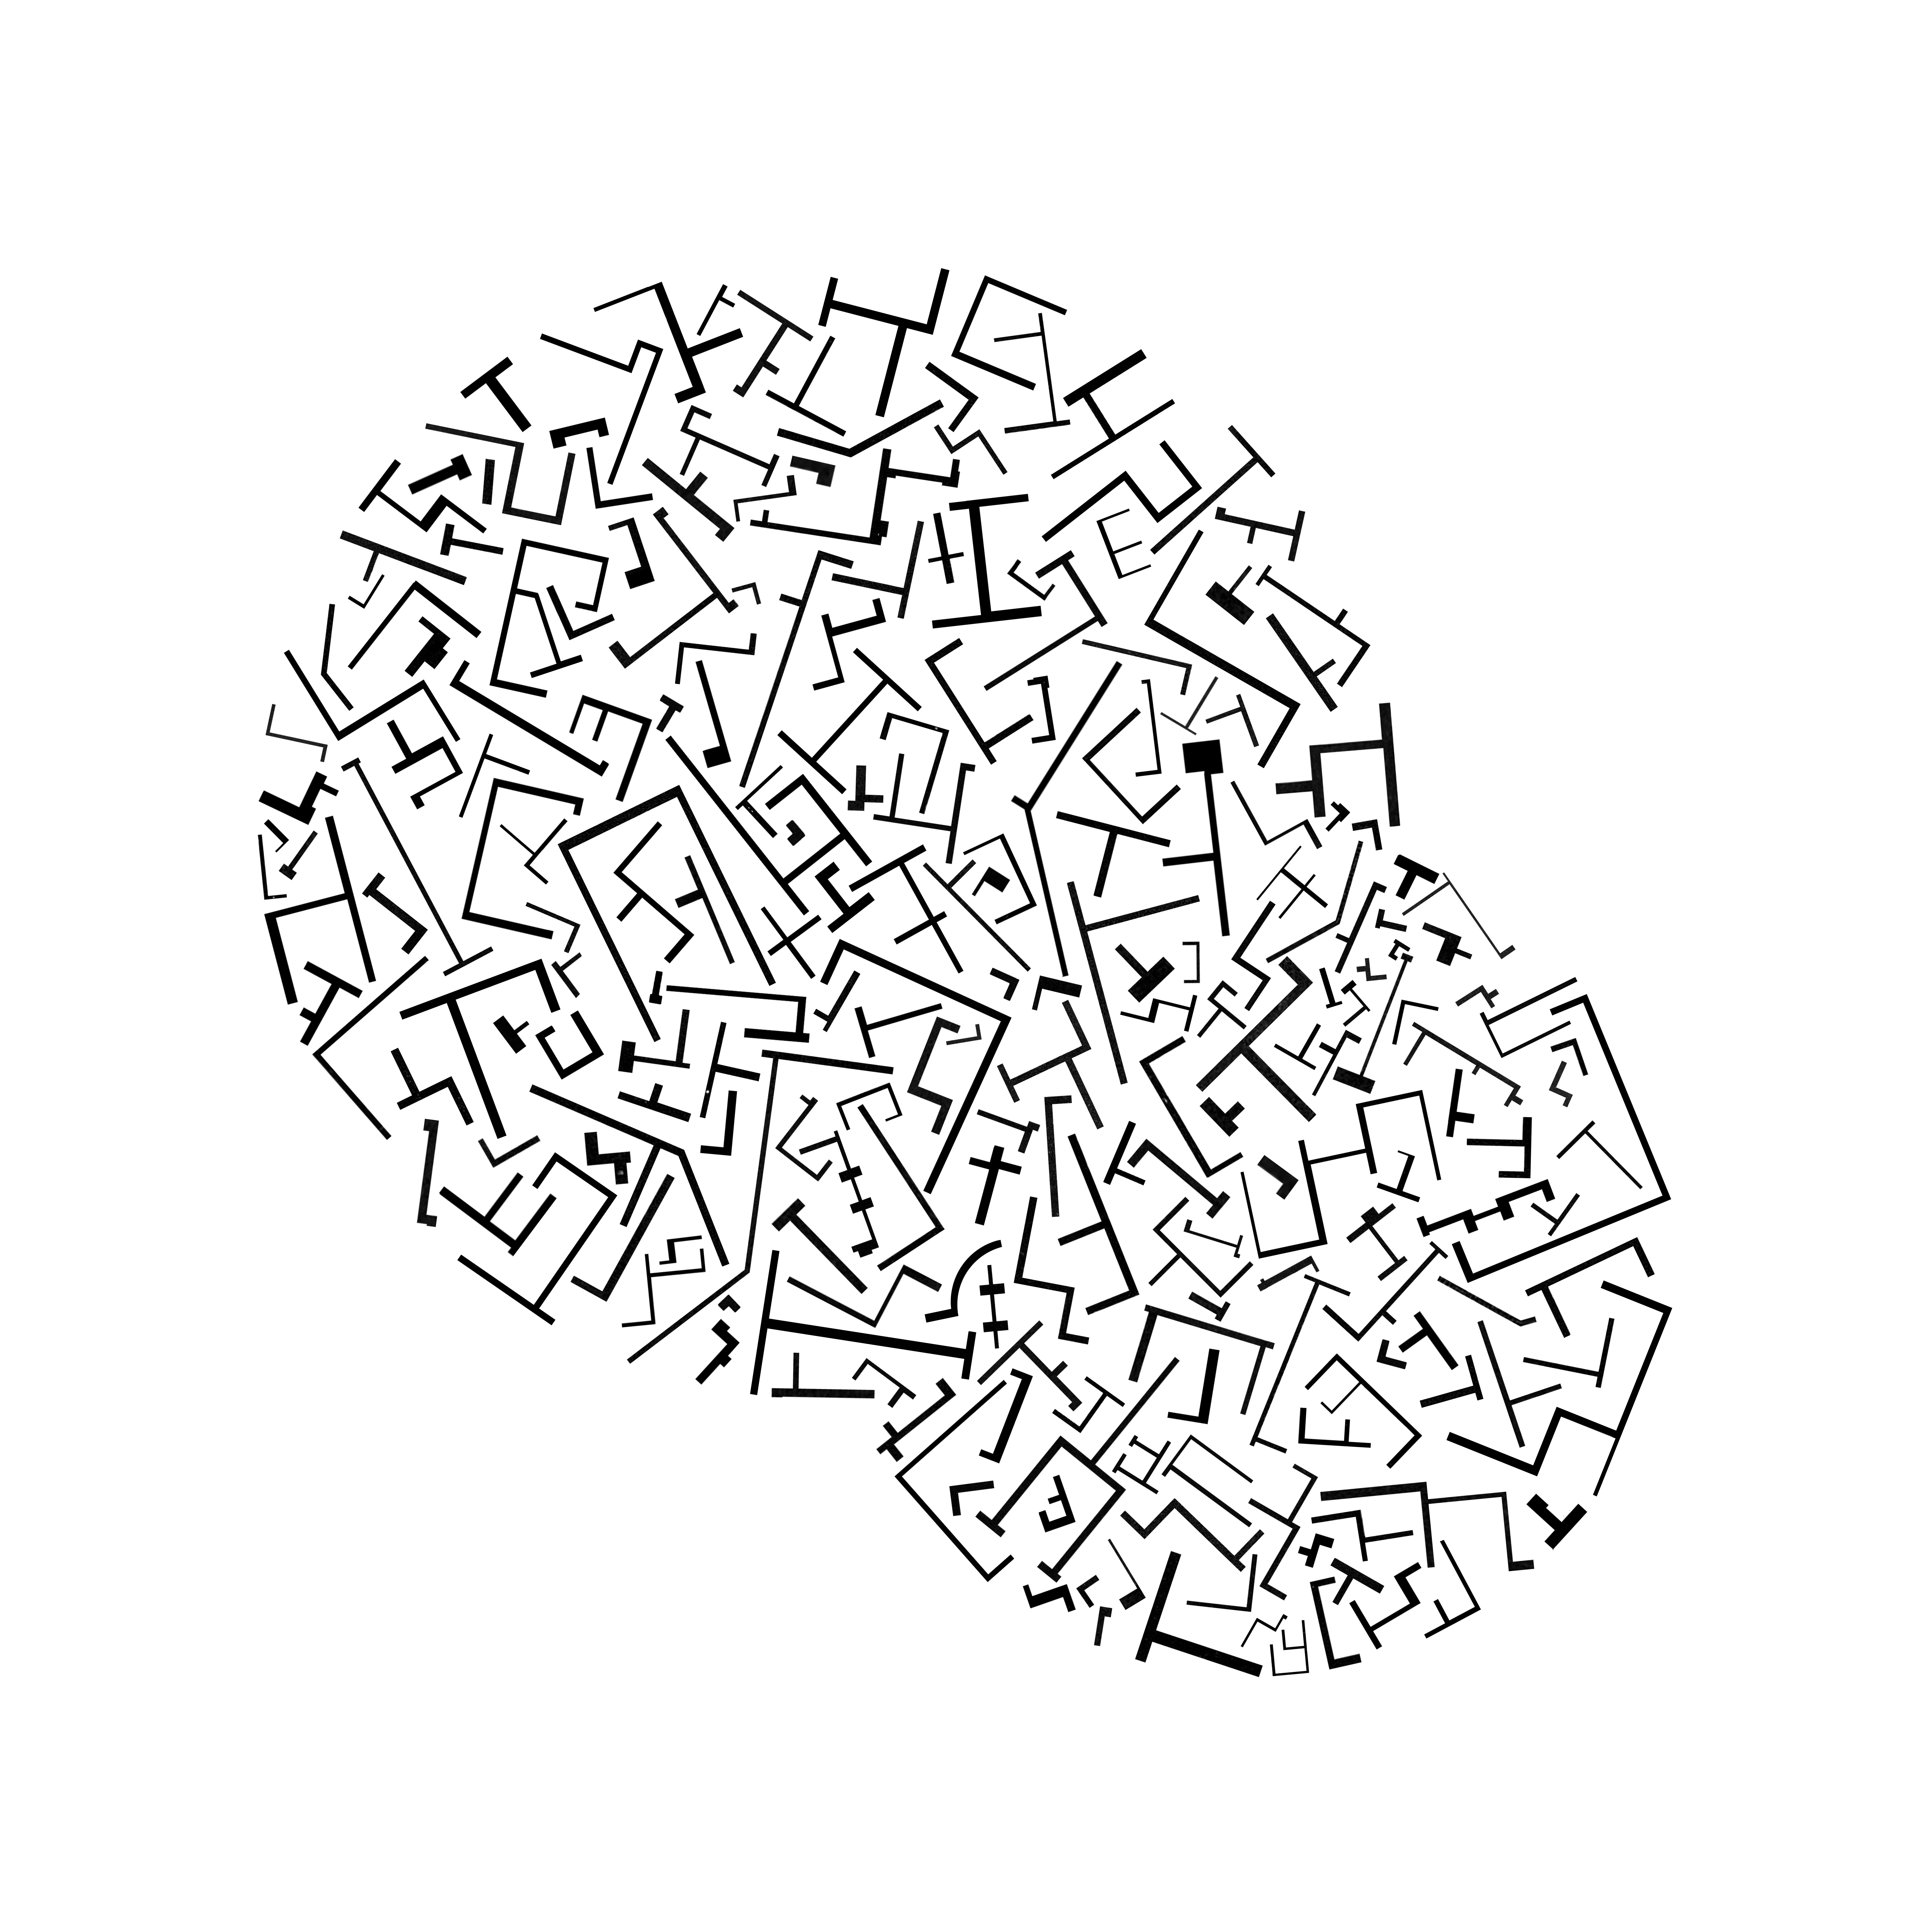
f. All walls must densely populate the shape.
g. All wall thicknesses should remain consistent for each individual wall.
h. All wall edges must be straight wherever the wall ends.
1. This should be taken care of in steps 7 & 7a.
i. All walls must be unique and beautiful.
15. Do not use the same wall twice from the stock file, in any shape file.
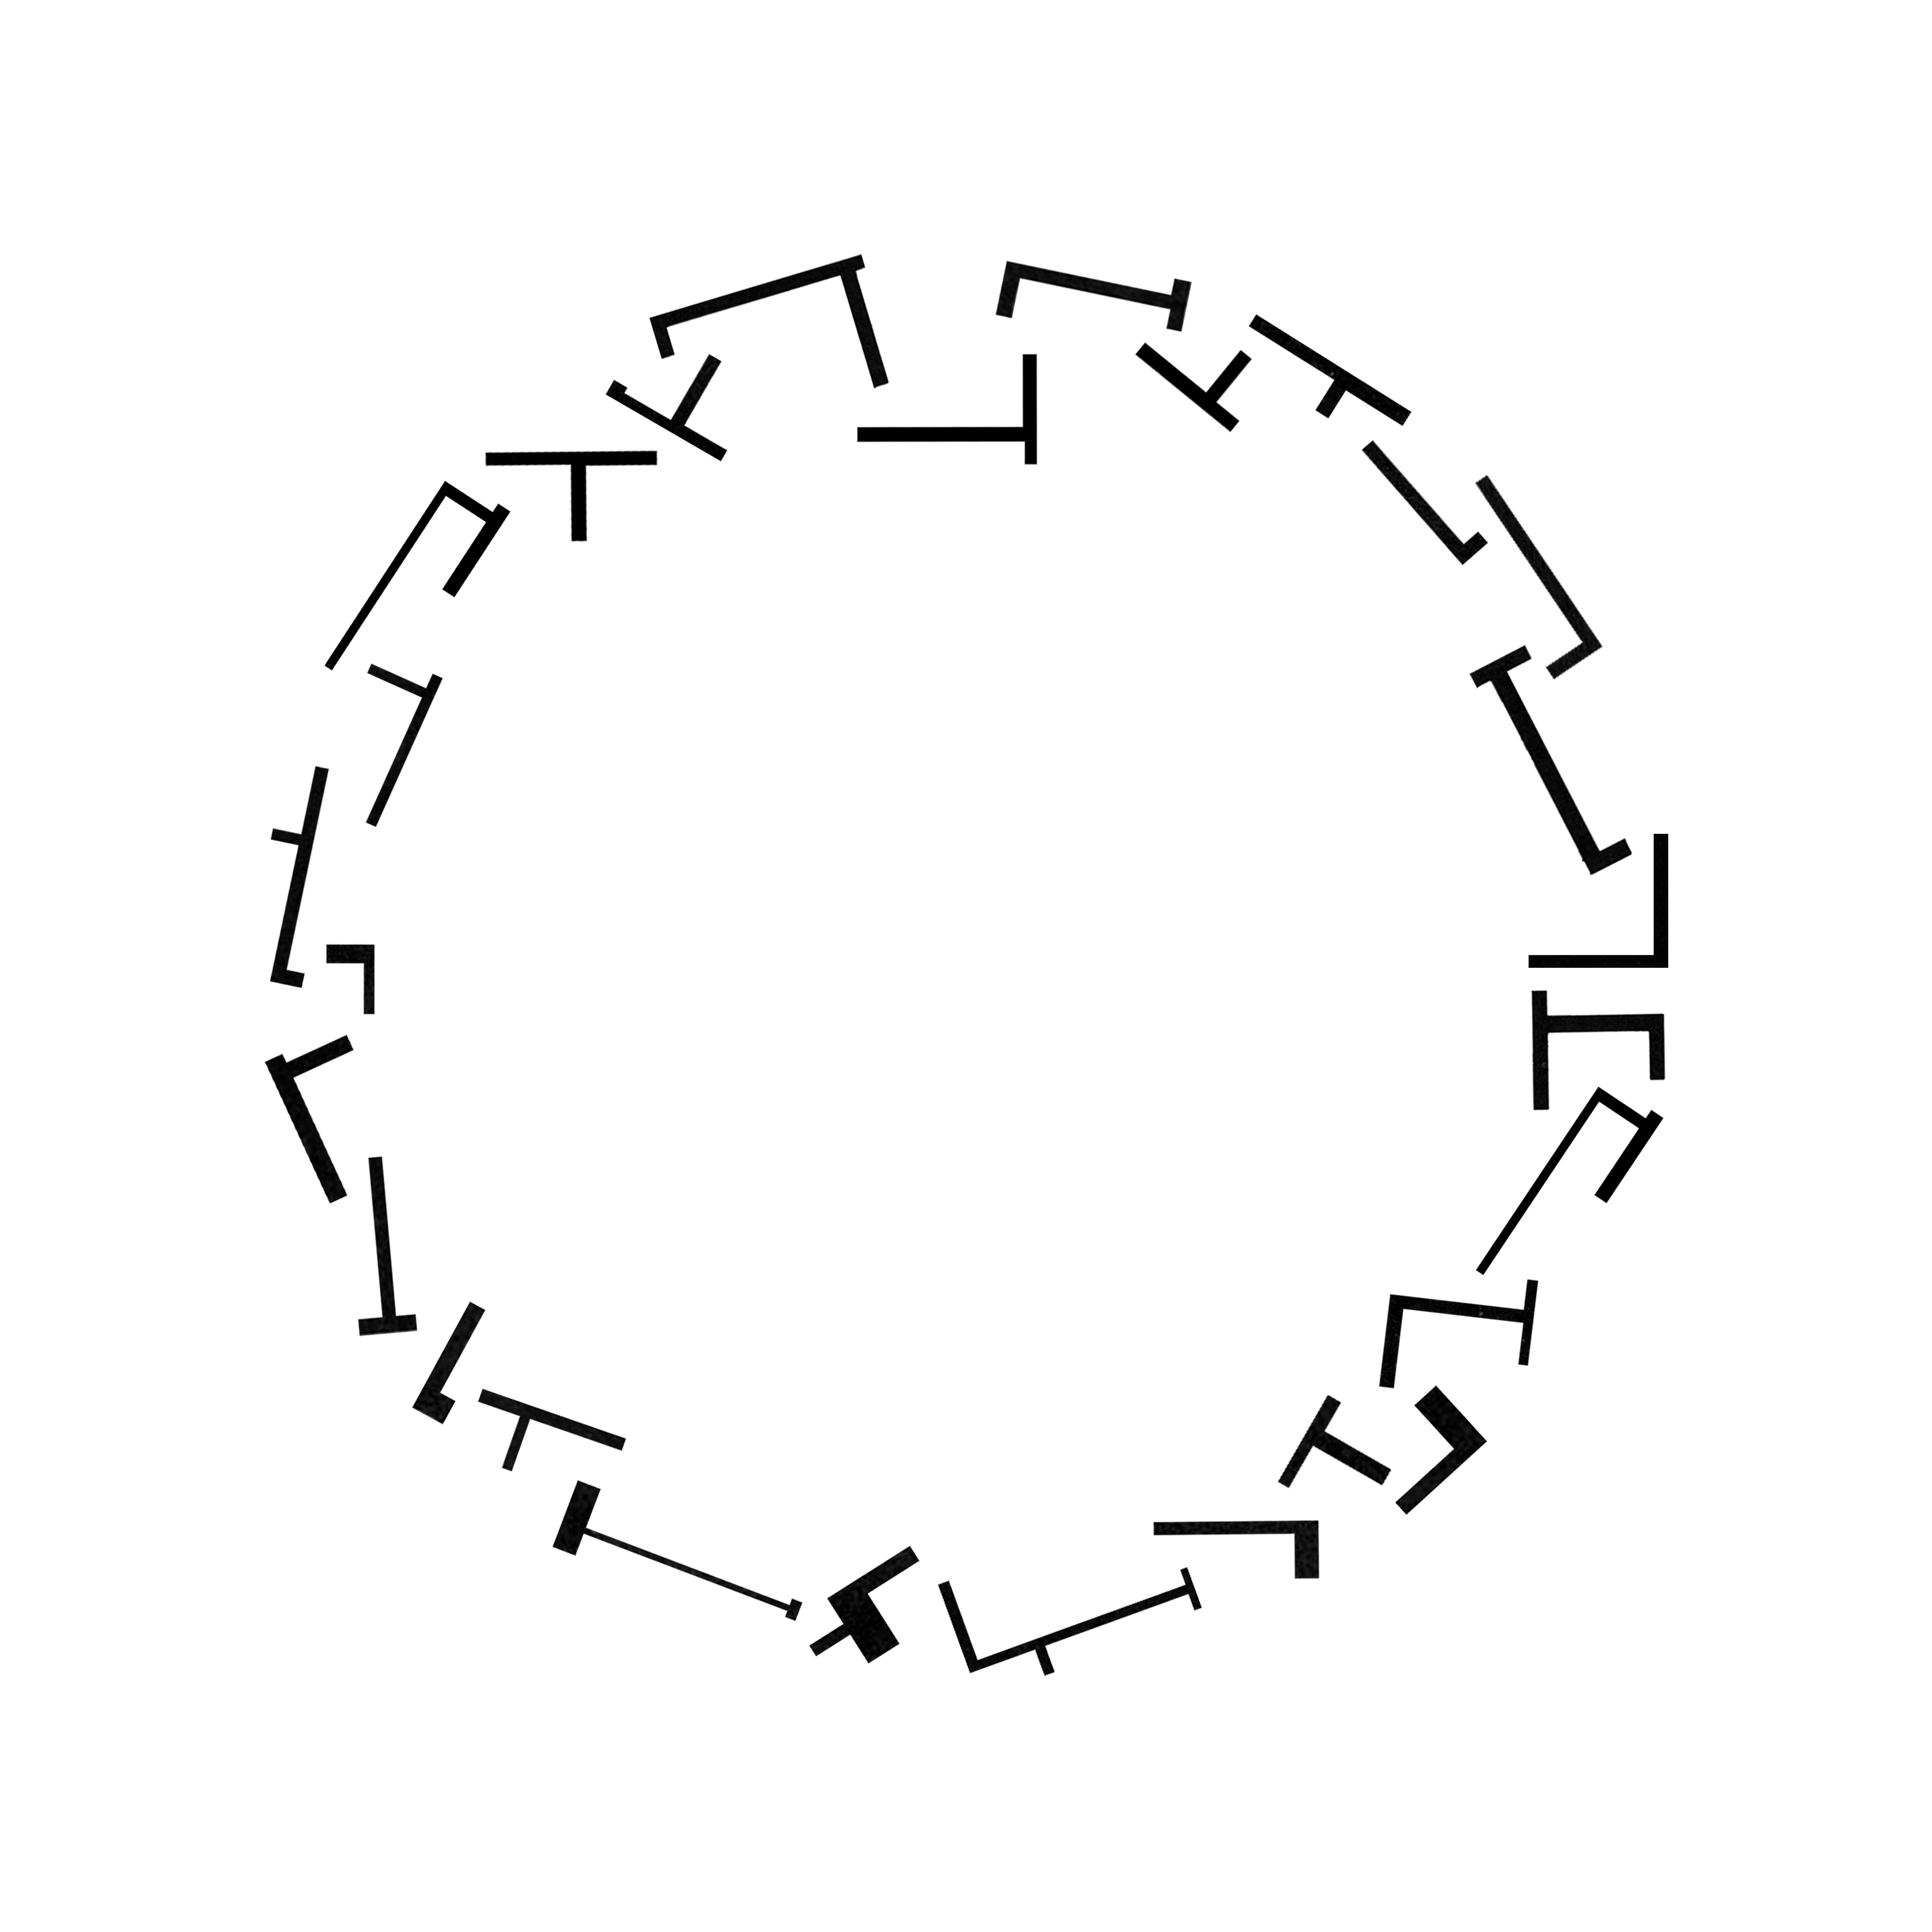
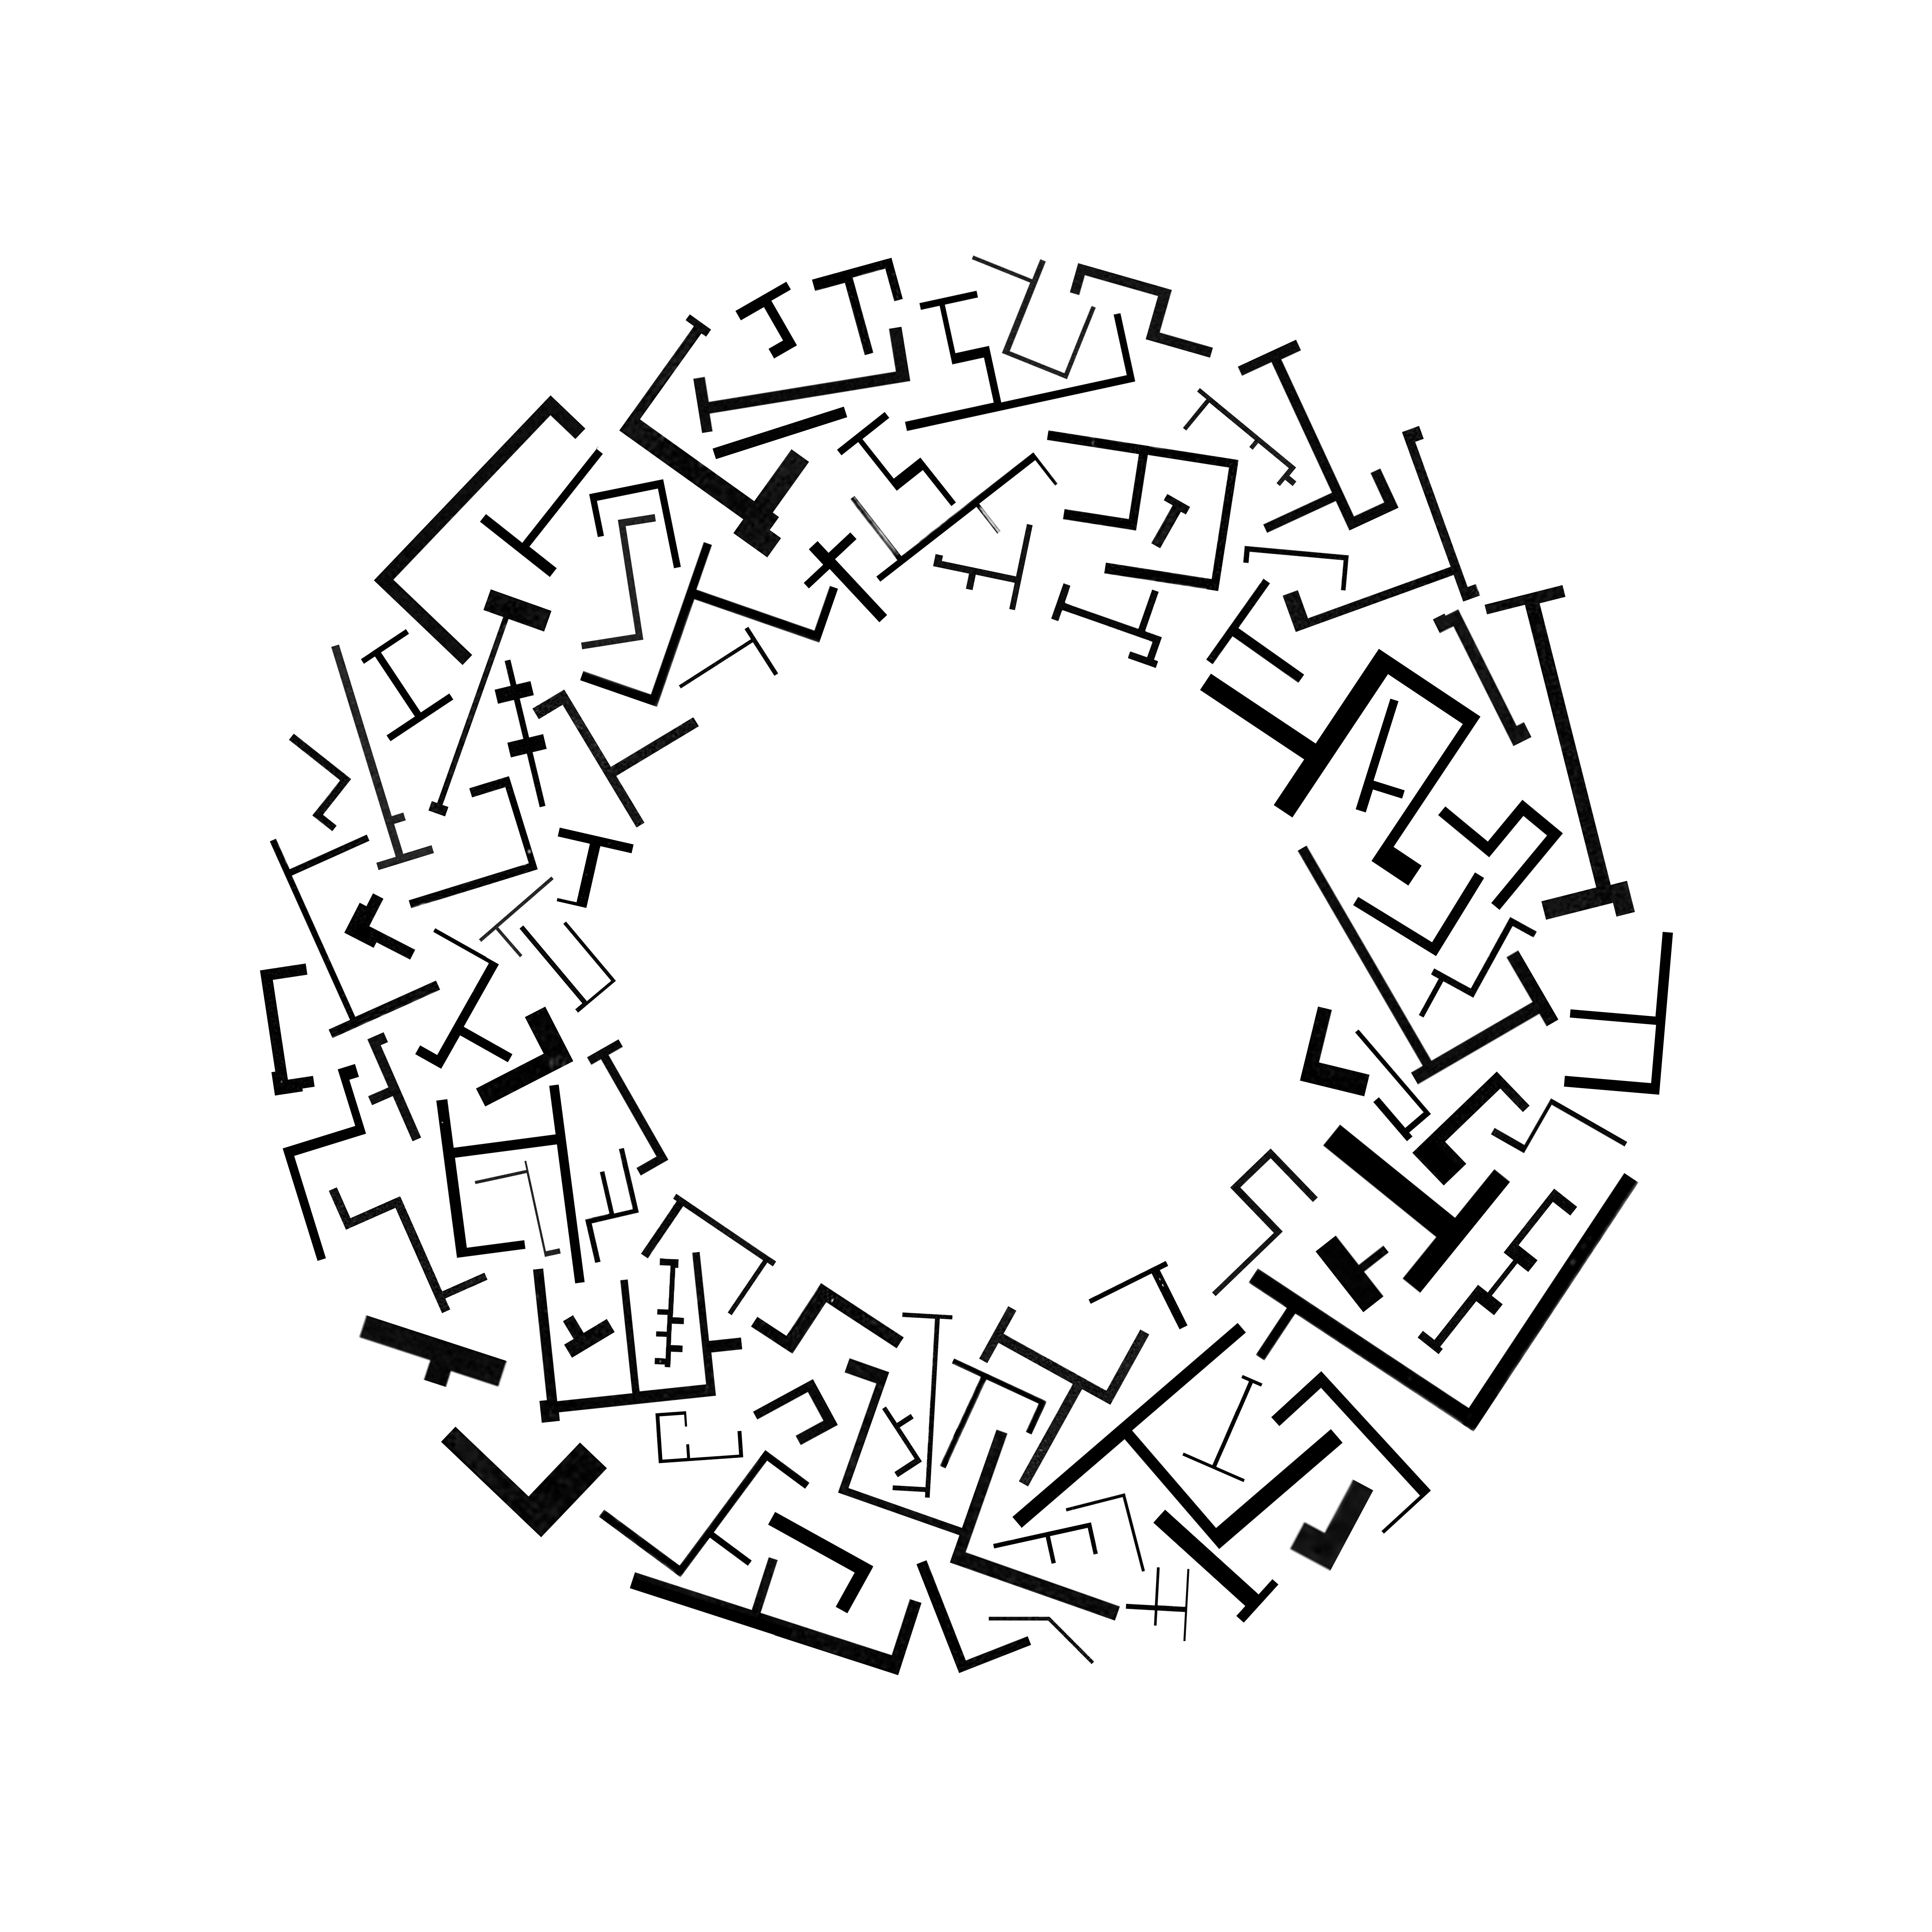
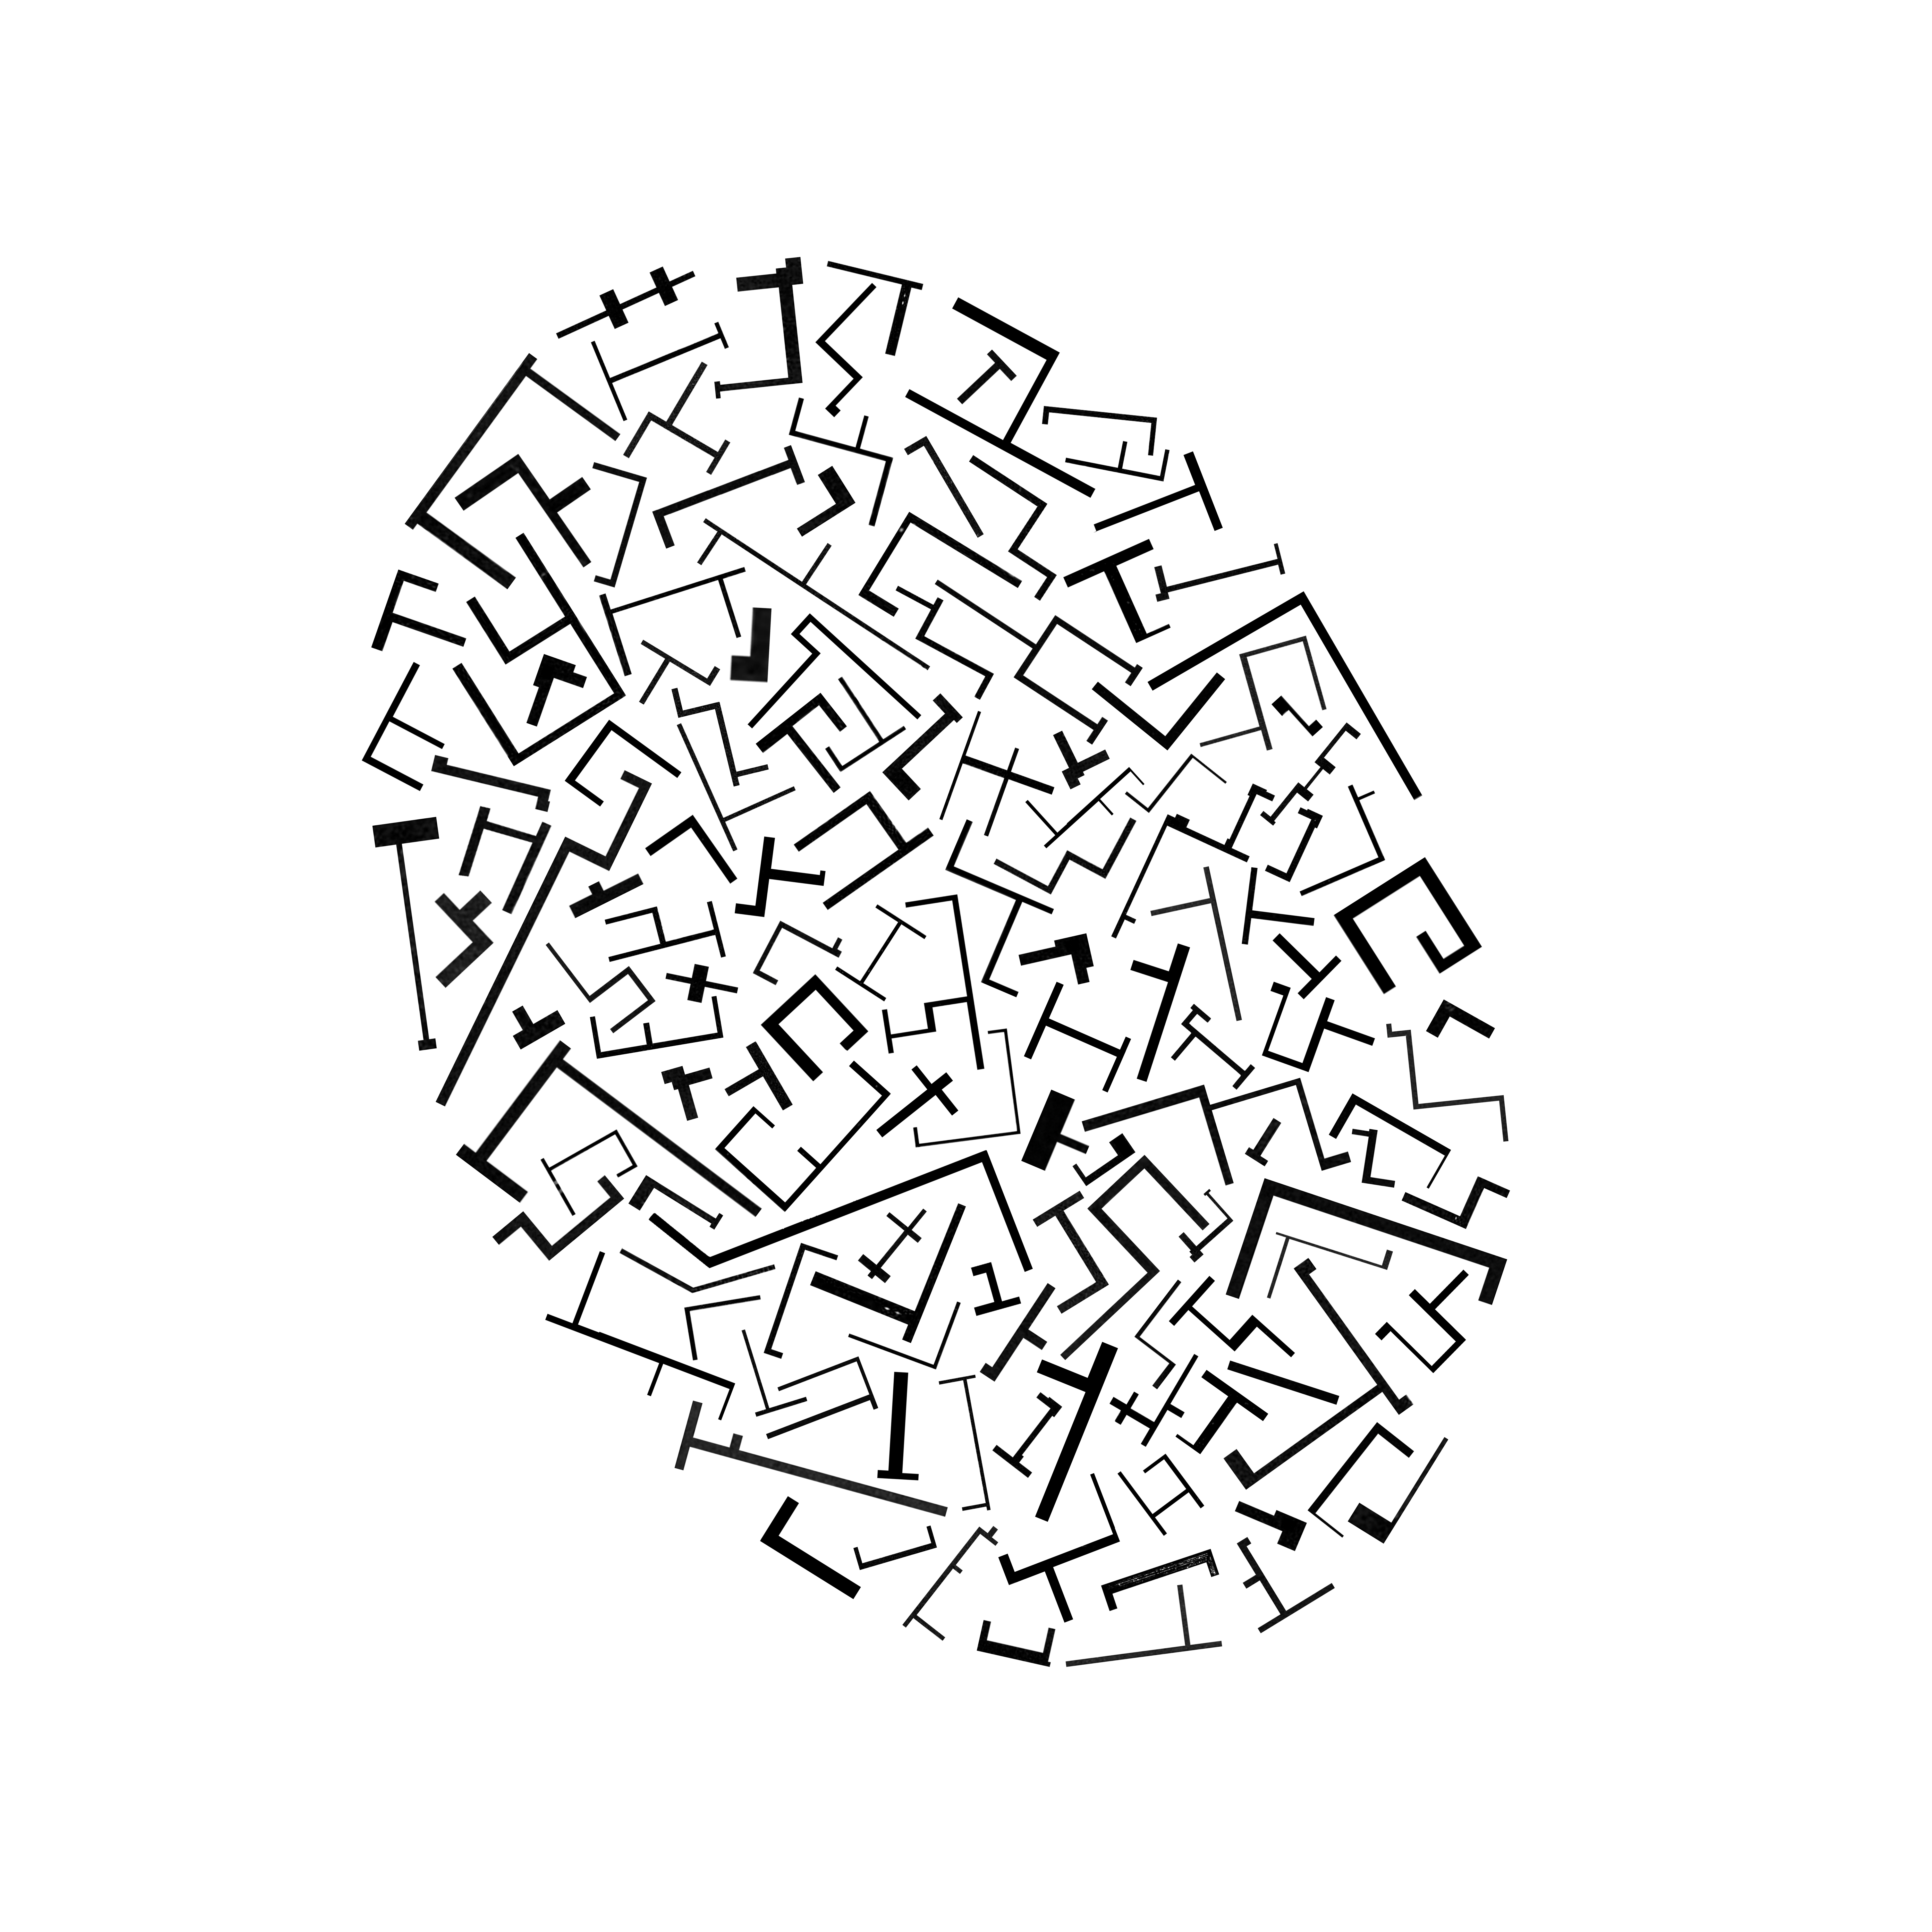
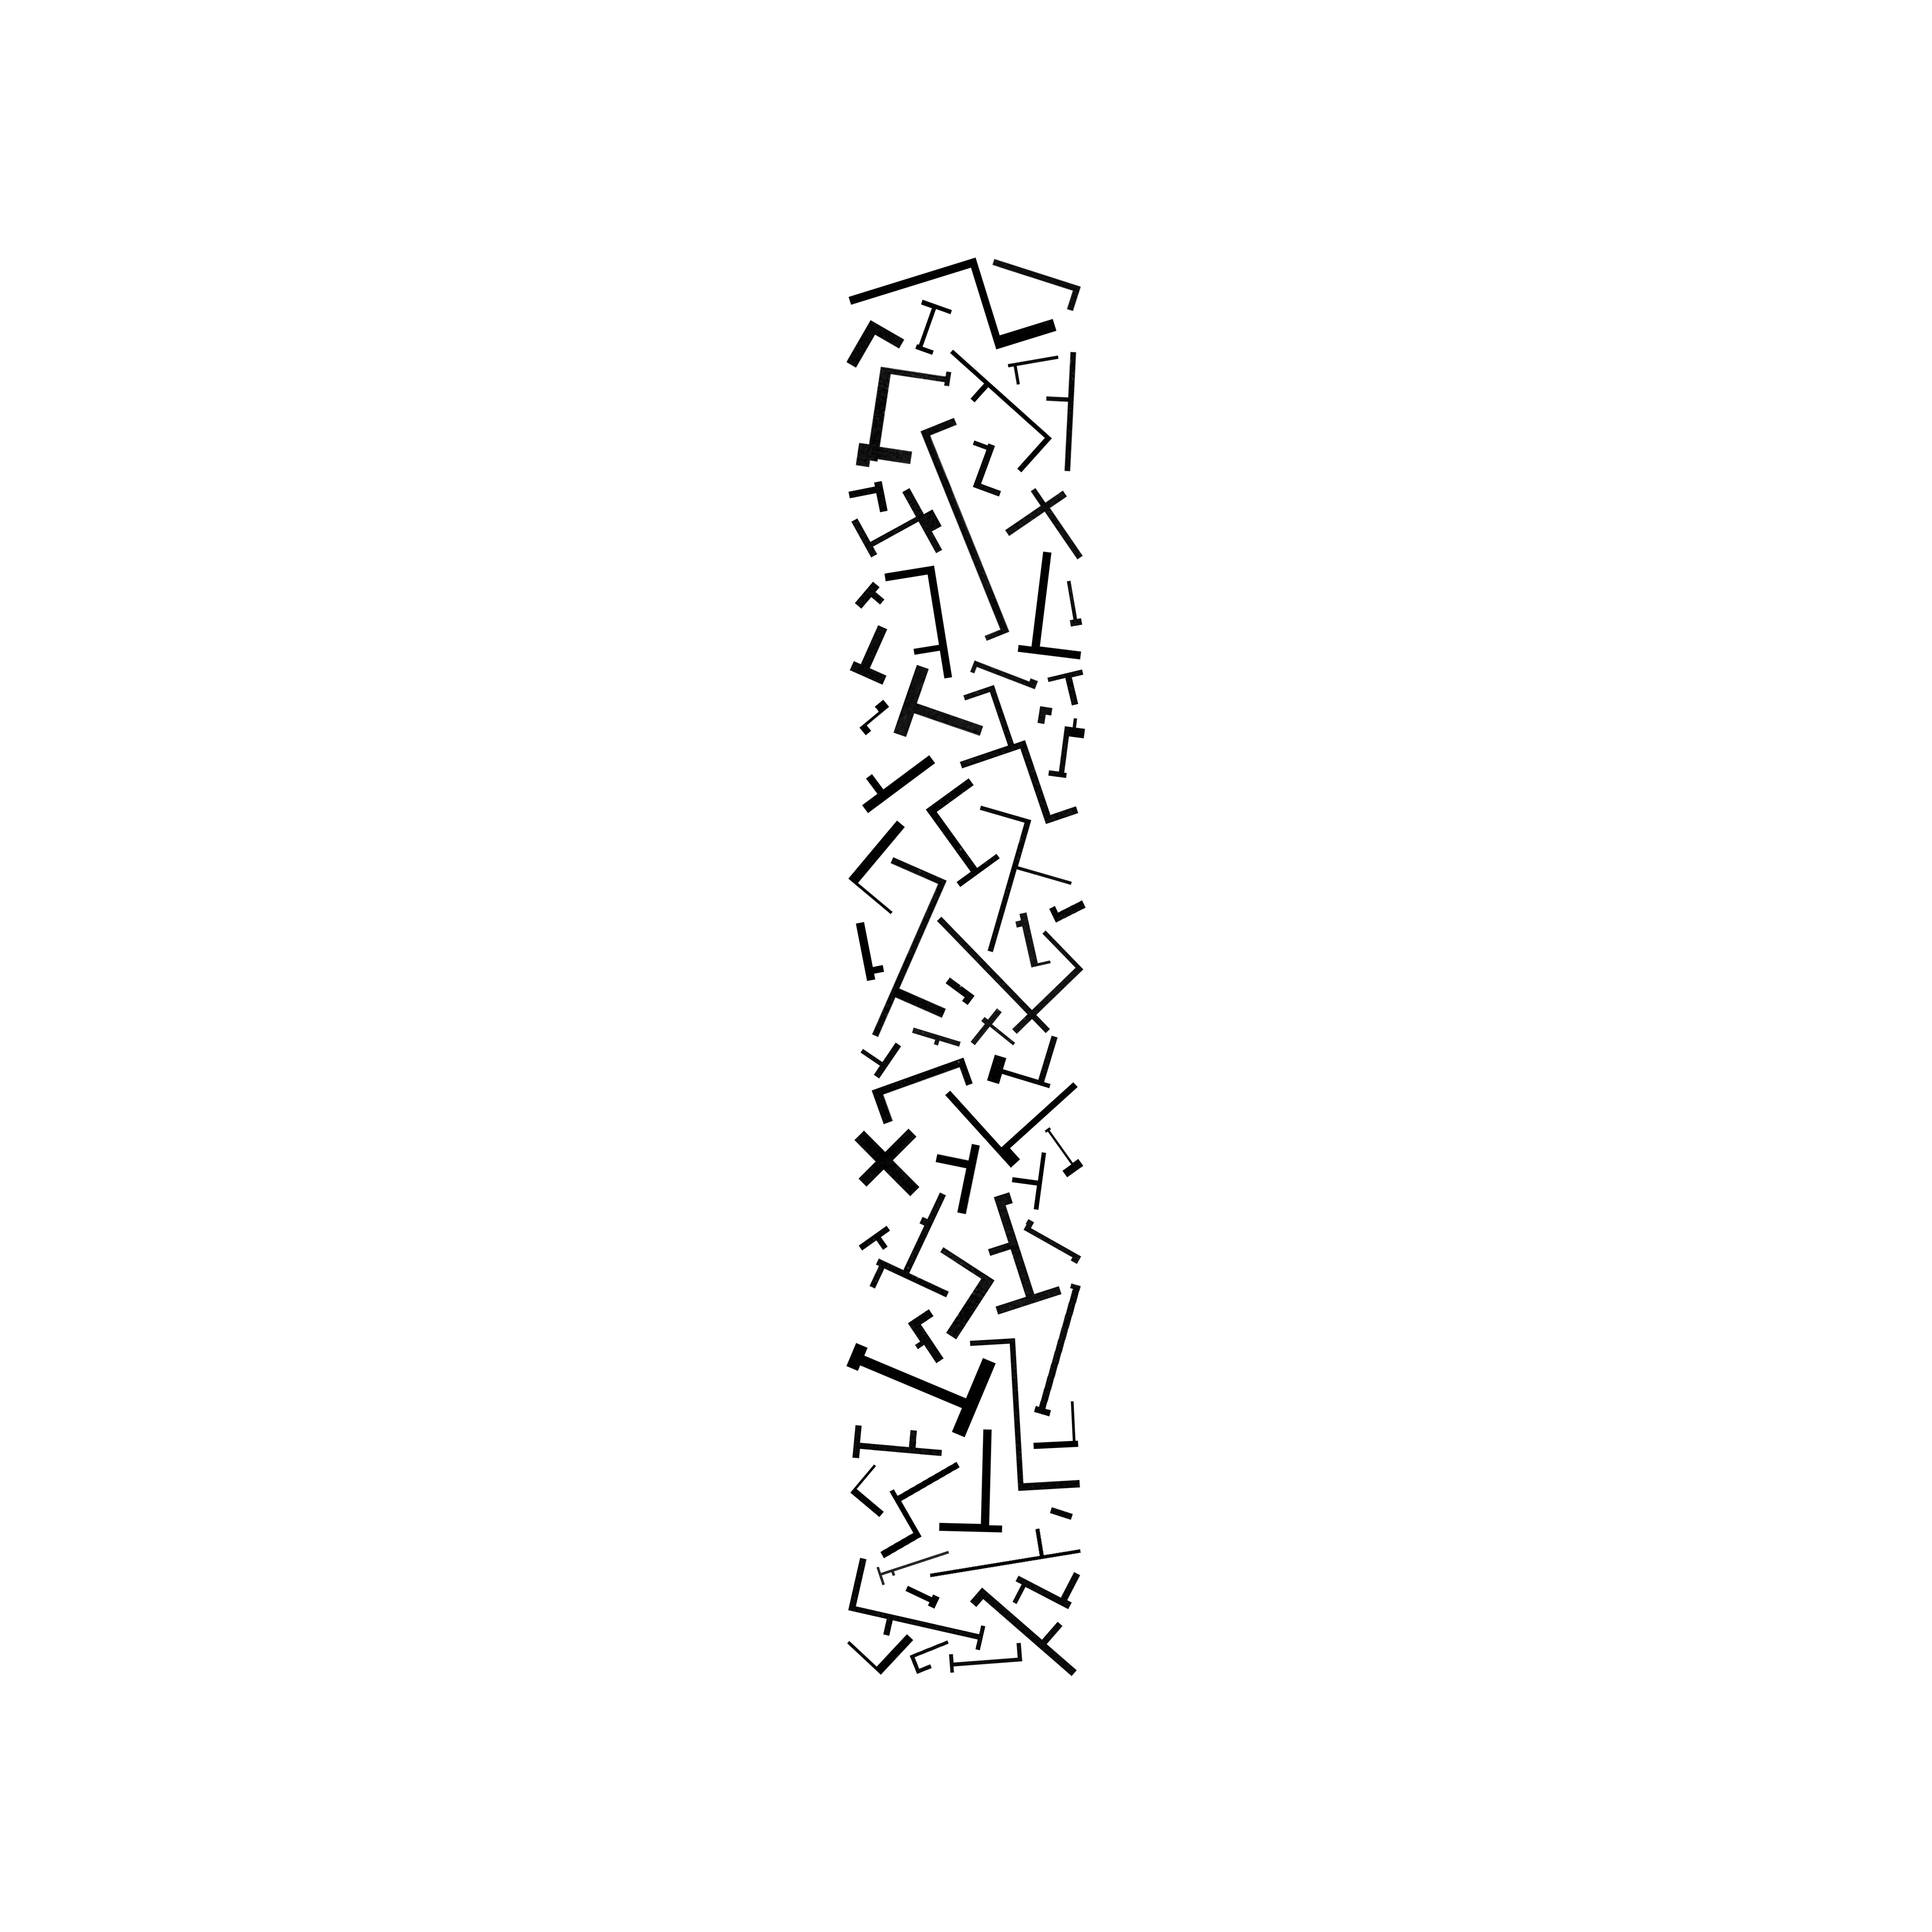
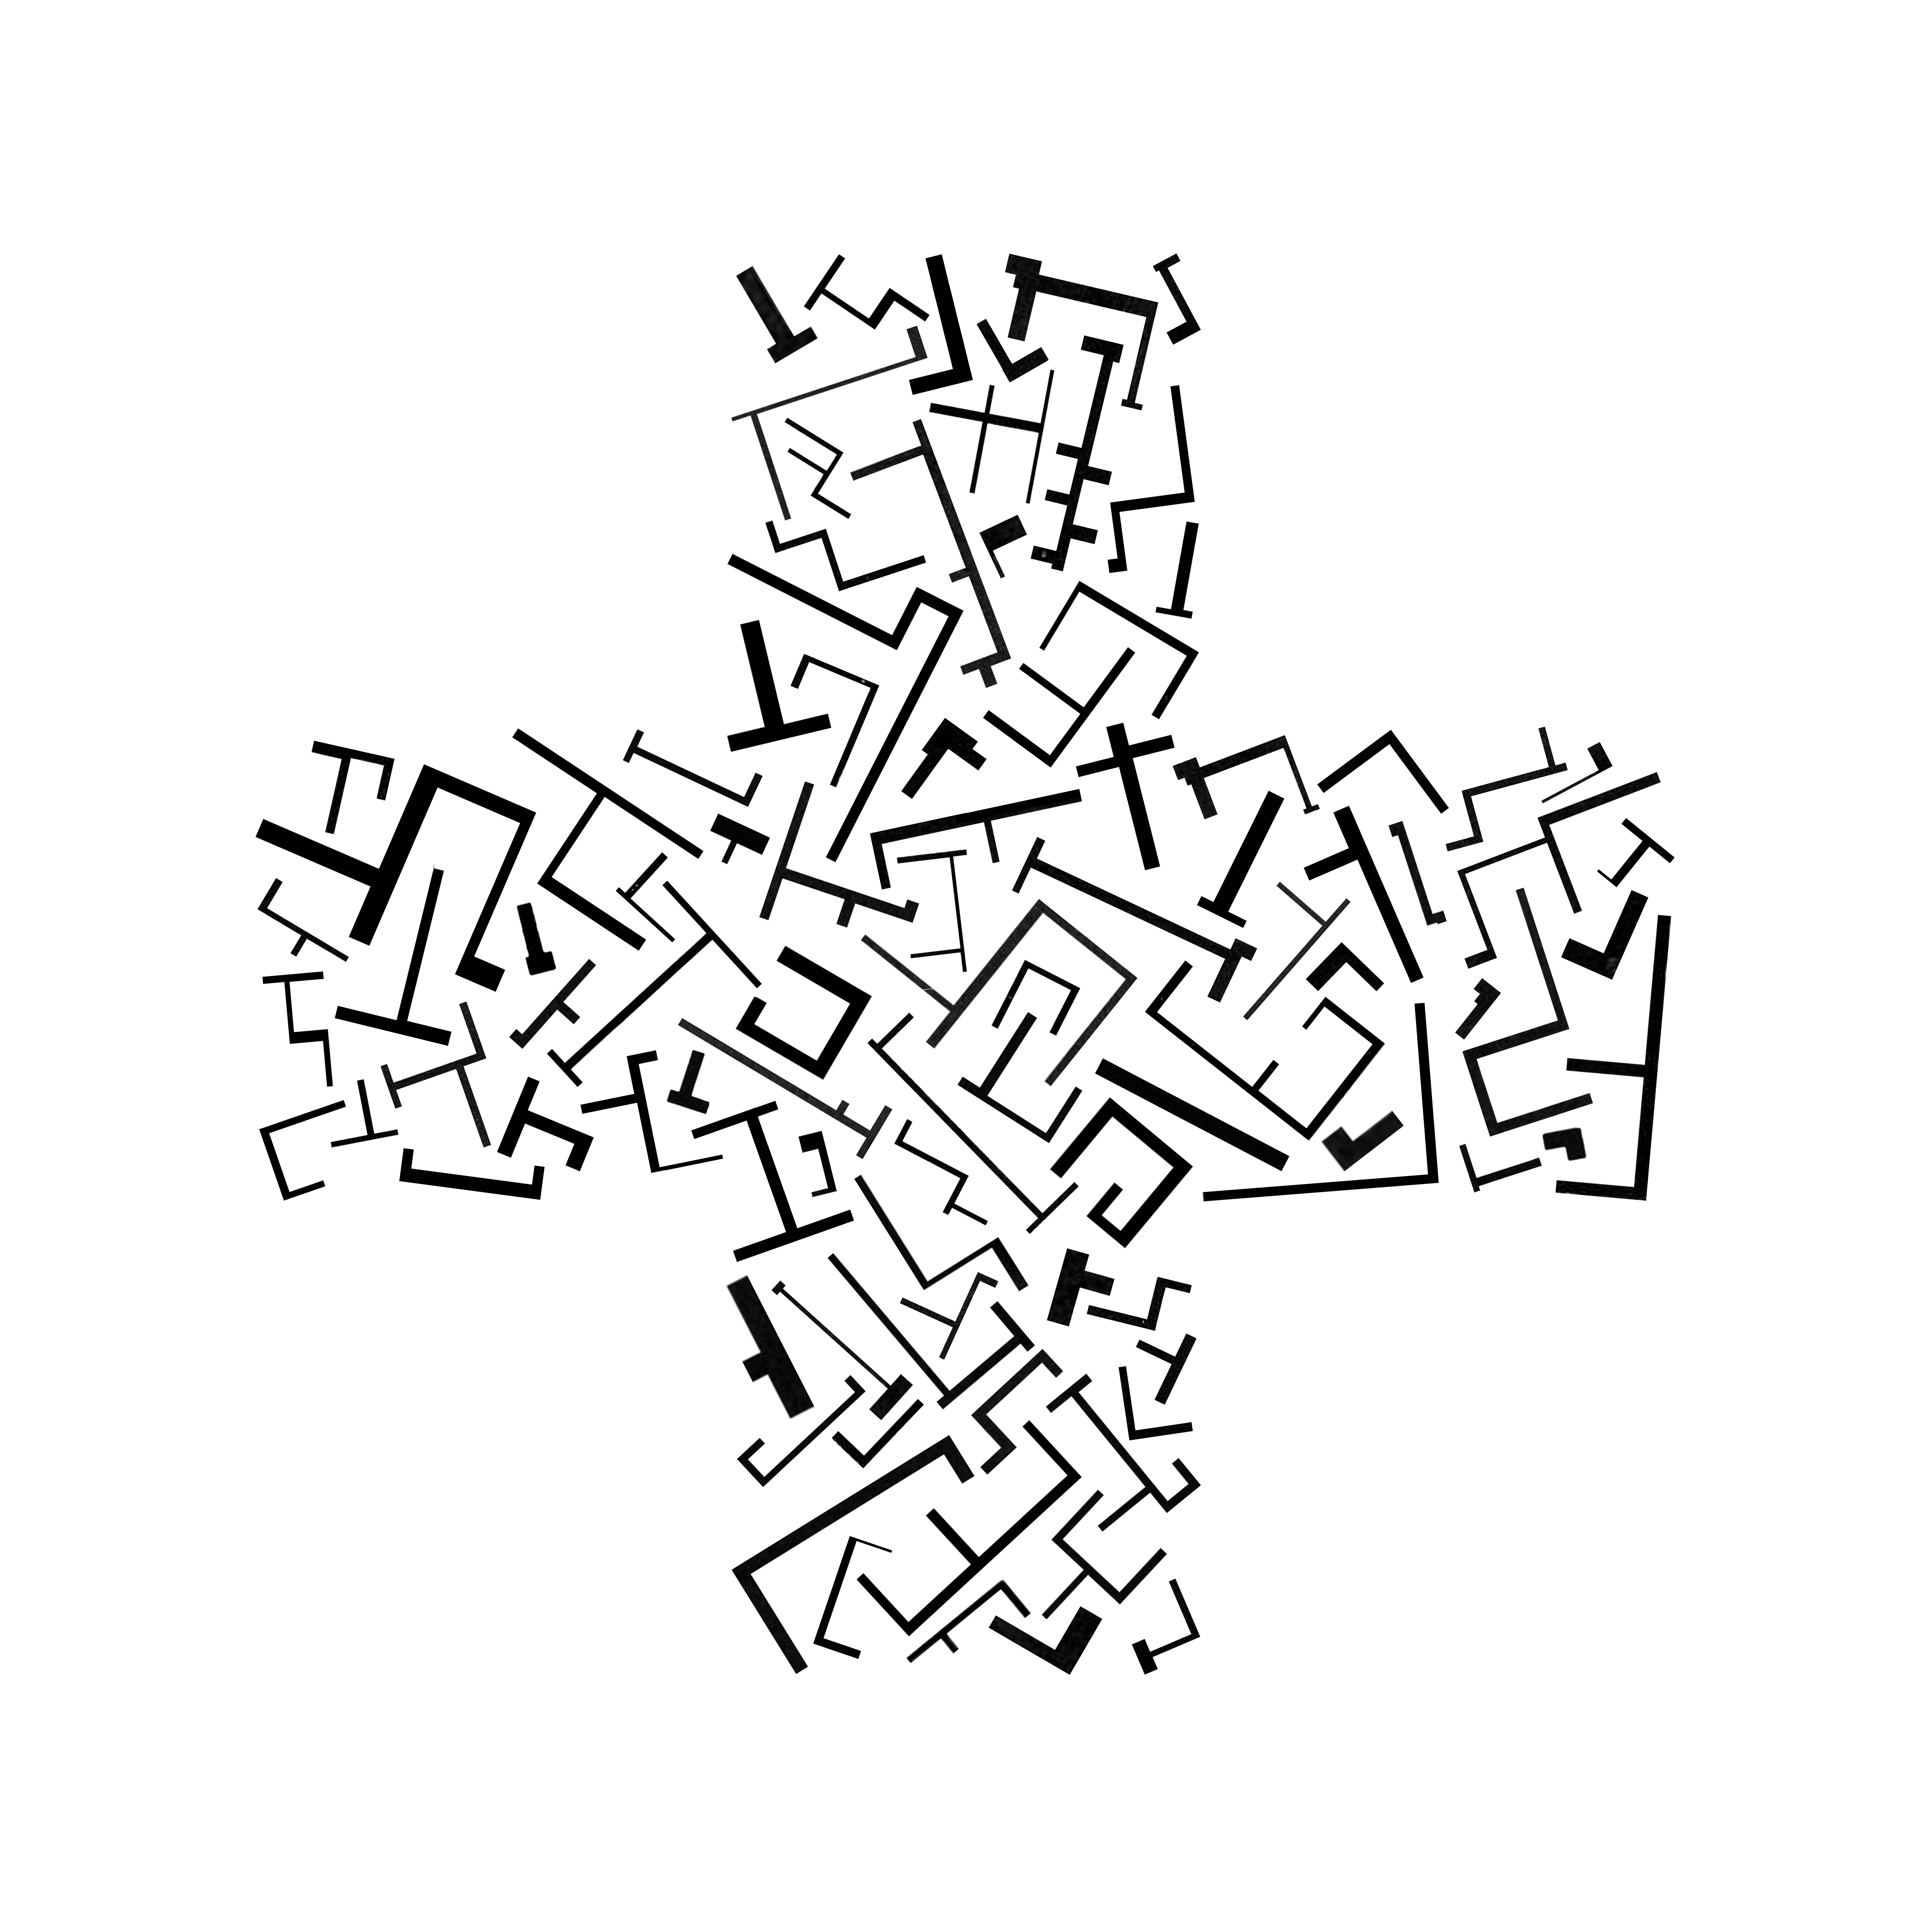
16. Be sure to line the edges of the shape with walls to show the contour of whatever shape you have selected.
a. From time to time turn the shape layer off to see how your project has developed.
1. The selected shape should be legible to the viewer.
17. The overall organization of walls should be labyrinthine without fully enclosing space. You should imagine people meandering within the shape of new walls.
a. If the shape of new wall does not appear labyrinthine repeat steps 14a – 14i.
18. If you run out of walls you can go to archiveofaffinities.tumblr.com.
19. Make new walls from plans with old walls that have been collected there.
20. Return to step 1.
a. For ease of selection, the floor plan should have mostly straight walls.
2. Select the ‘Rectangular Marquee Tool’ (M).
3. Drag your mouse over the selection of the wall you would like to cut out.
a. Be sure to choose architecturally attractive walls.
4. Select the ‘Move Tool’ (V).
5. Right click and remove the wall from the overall floor plan.
6. Drag the wall section into a separate Photoshop file. This will become your stock file of new walls made from old walls.
7. Using the ‘Rectangular Marquee Tool’ (M), clean up the old wall. Edges must be straight.
a. Delete all white space from the old wall.
b. Walls should be open and not fully enclosing space.
1. No closed off squares, circles, triangles, etc.
8. Contemplate all the new walls that have been made from old walls and gathered in the separate Photoshop file, the stock file of new walls.
a. Be sure that new walls do not overlap.
b. New walls should be organized be size and line weight.
9. Create a new file in Photoshop, this will be your shape file.
a. The dimensions of the shape file are arbitrary, and can be adjusted for any particular use.
b. The followers of these steps may choose a size for their document.
10. Select the ‘Shape Tool’ (U).
11. Choose a shape.
a. Users may select any of the shapes offered by Photoshop, sample shapes from elsewhere, or create their own shape.
b. Shapes may be layered, stacked, or overlapped.
12. Drag shape to desired size and position in document.
a. A small margin of white space should be left on all sides of the shape.
13. Fill the shape with color #ff0000.
14. Using the shape as a guide, begin to drag walls, using the ‘Move Tool’ (V) from the stock file that contains new walls made from old walls into the shape file.
a. All walls should be different.
b. All walls should be closely related to other walls in their thickness.
c. All walls should be rotated on a unique axis and not parallel with one another.
d. All walls should have distance between them and not touch.
e. Some walls should spatially interlock with the walls adjacent to them.
f. All walls must densely populate the shape.
g. All wall thicknesses should remain consistent for each individual wall.
h. All wall edges must be straight wherever the wall ends.
1. This should be taken care of in steps 7 & 7a.
i. All walls must be unique and beautiful.
15. Do not use the same wall twice from the stock file, in any shape file.
16. Be sure to line the edges of the shape with walls to show the contour of whatever shape you have selected.
a. From time to time turn the shape layer off to see how your project has developed.
1. The selected shape should be legible to the viewer.
17. The overall organization of walls should be labyrinthine without fully enclosing space. You should imagine people meandering within the shape of new walls.
a. If the shape of new wall does not appear labyrinthine repeat steps 14a – 14i.
18. If you run out of walls you can go to archiveofaffinities.tumblr.com.
19. Make new walls from plans with old walls that have been collected there.
20. Return to step 1.